CMS Content Export & Import
Steps to Export & Import the content from CMS is as follows, You need to login as AOK user in CMS.
Export Content
Single Export
Single export is exporting only single content at a time. Steps to Export Single Content :
- Click on 'Inhalt(content)' It will open all content list page.
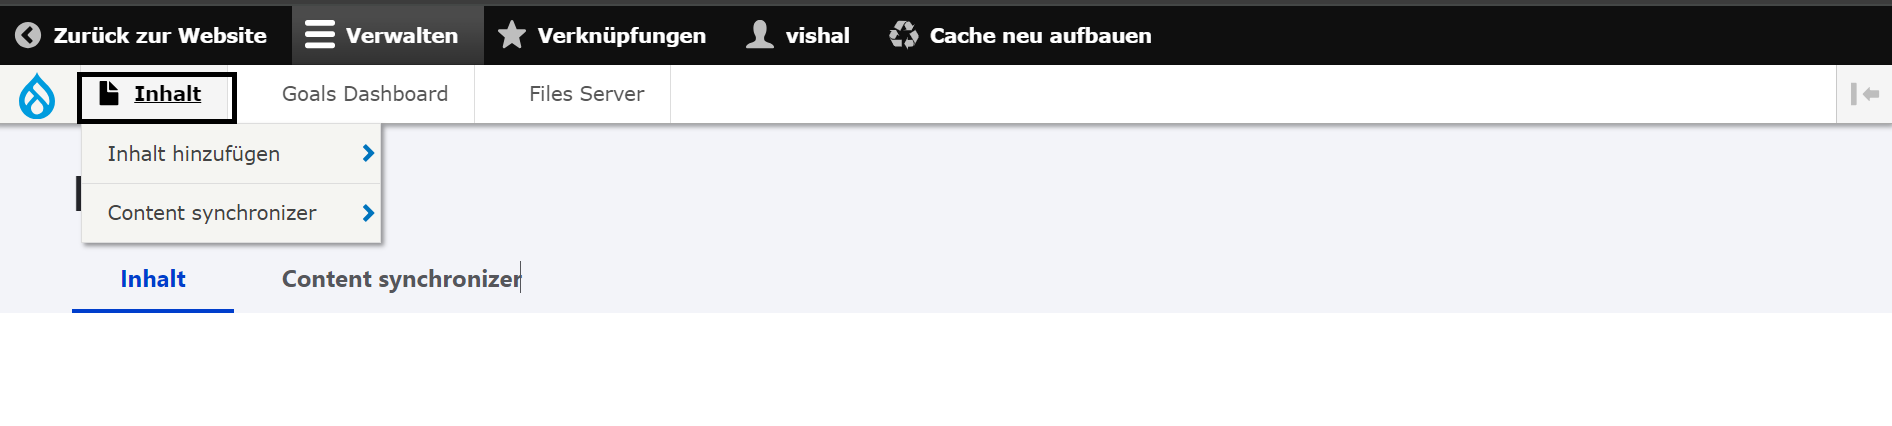
- Select the checkbox at left side parallel to the content 'Titel' it will open Black section at bottom.
- At black section click on '- Auswahlen - (Choose)' -> Click on 'Export entity' it will open a export confirmation page.
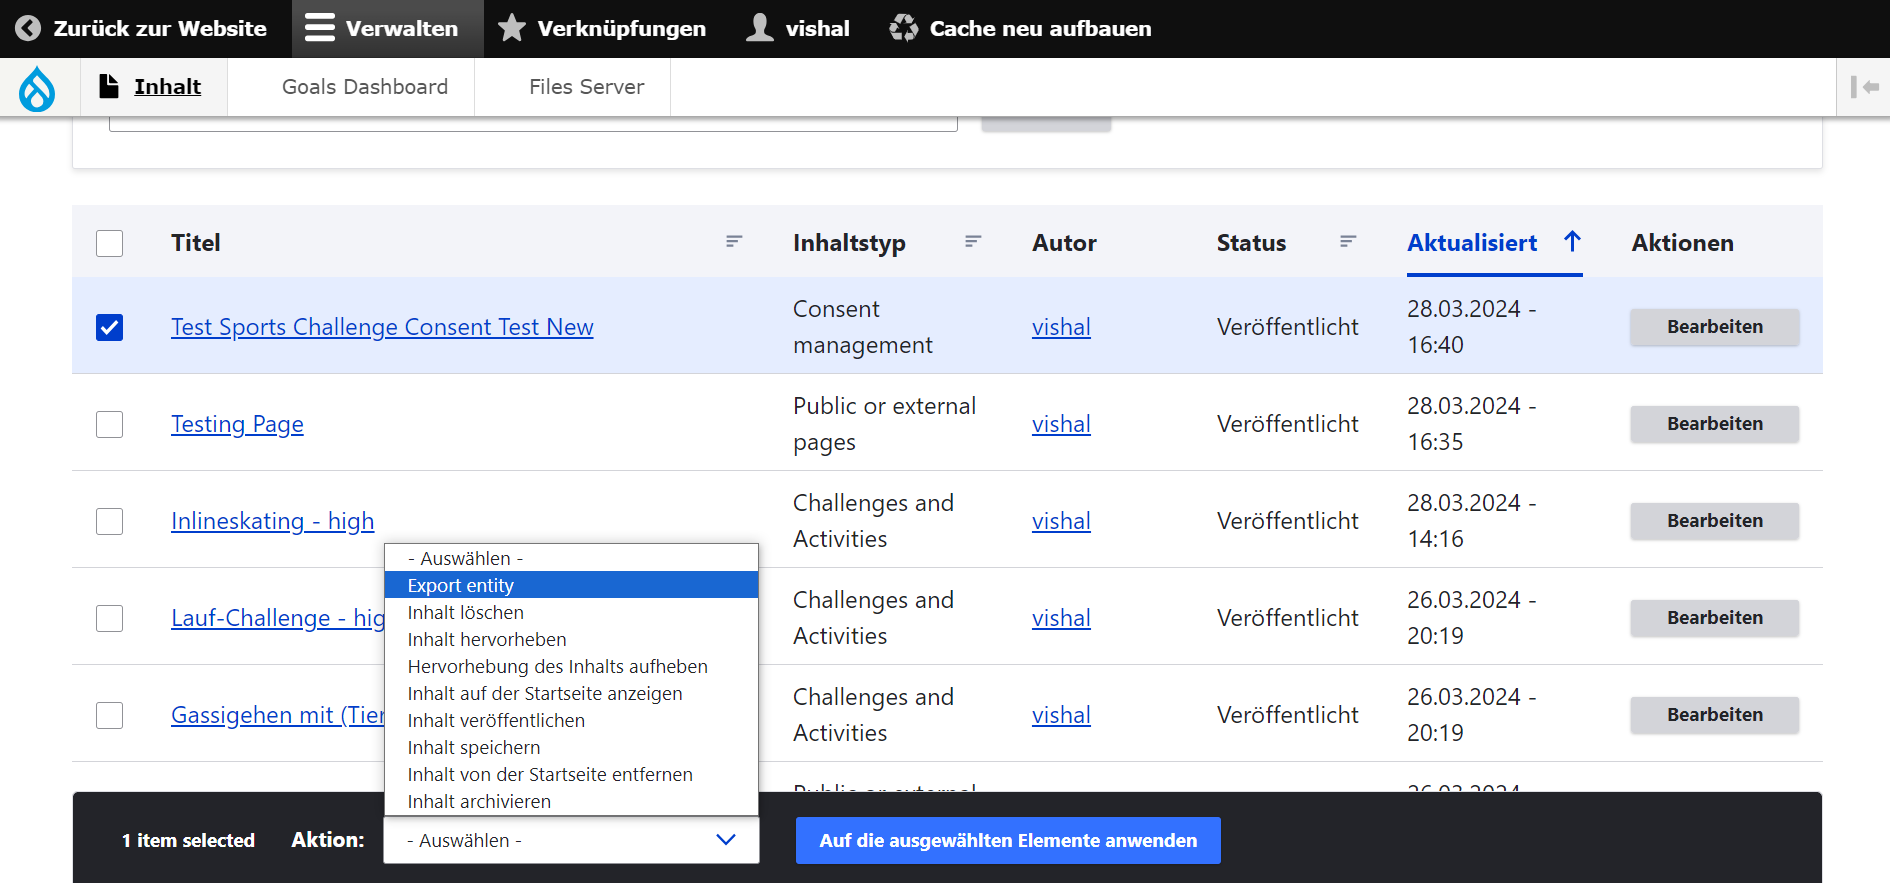
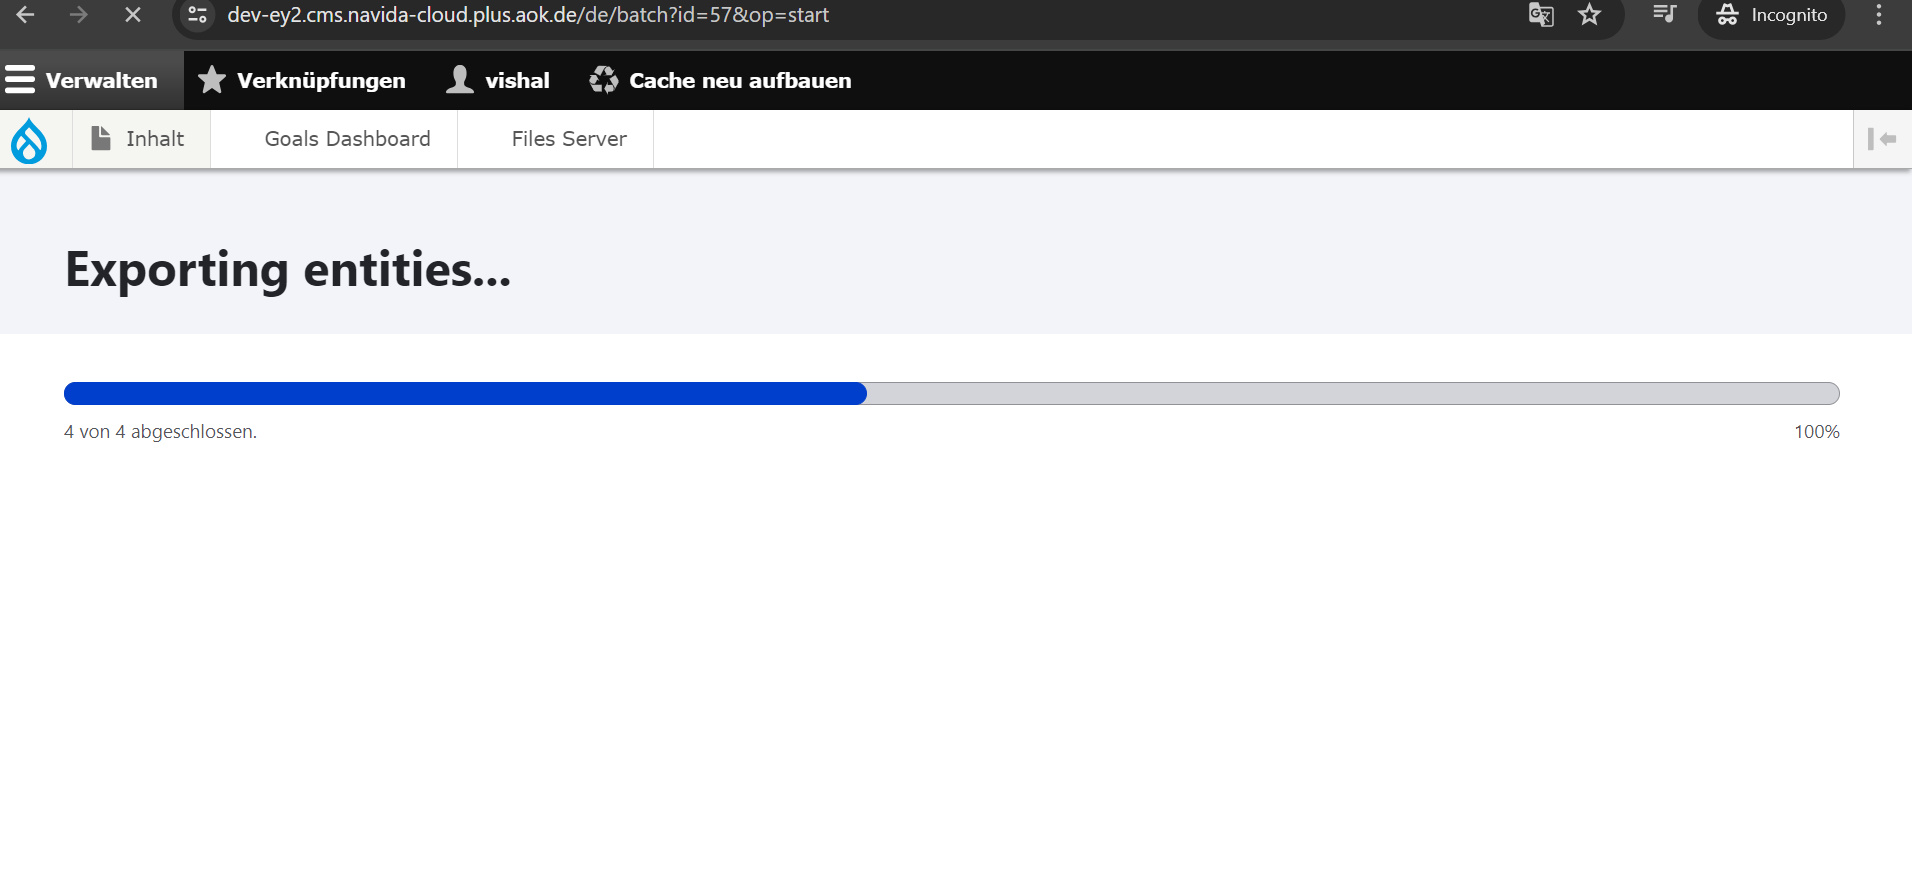
- At Export confirmation page Click on 'Export entity' it will start the export process and once the export complete it will download the '.tar.gz' file contains the exported data.

Bulk Export Content
Bulk export is we can export content more than one at a time. Steps to Export Bulk Content :
- Click on 'Inhalt(content)' It will open all content list page.
- Select the checkboxes at left side parallel to the content 'Titel' it will open Black section at bottom.
- At black section click on '- Auswahlen - (Choose)' -> Click on 'Export entity' it will open a export confirmation page.
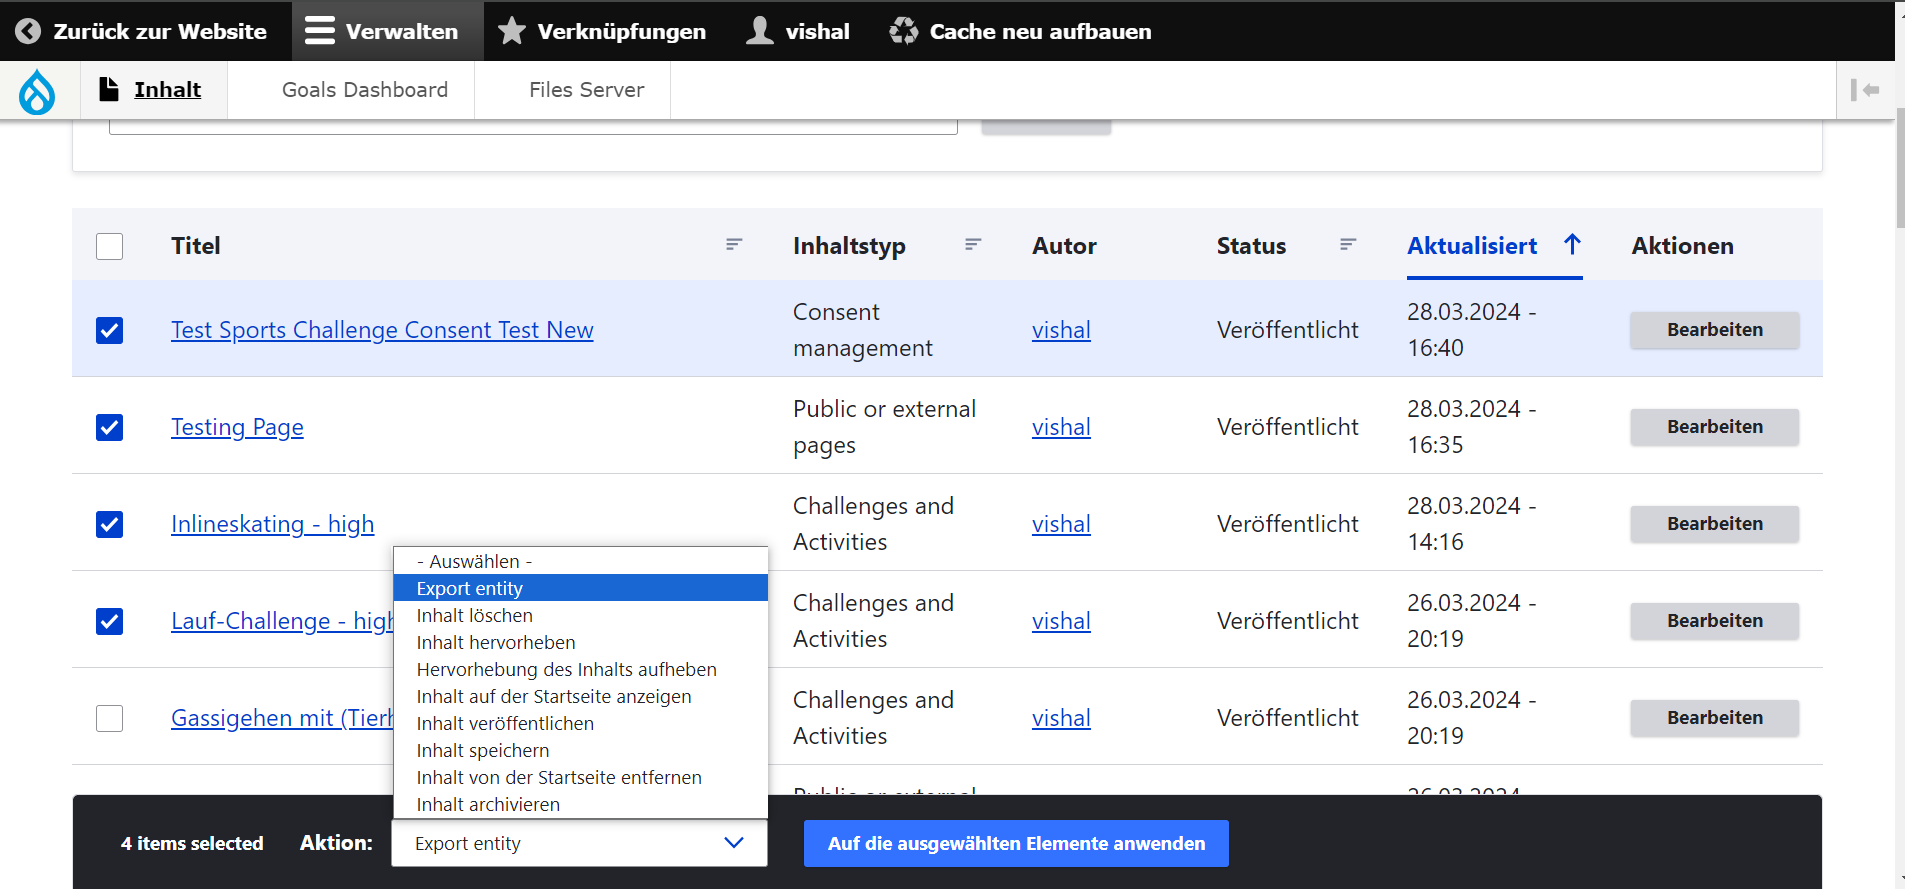
- At Export confirmation page Click on 'Export entity' it will start the export process and once the export complete it will download the '.tar.gz' file contains the exported data.
Note:- For Challenges & Activities content type we can export six (6) content at a time.
Bulk Export with Export Entity
Steps to Export Single Content :
- Click on 'Inhalt(content)' It will open all content list page.
- Select the checkboxes at left side parallel to the content 'Titel' it will open Black section at bottom.
- At black section click on '- Auswahlen - (Choose)' -> Click on 'Export entity' it will open a export confirmation page.
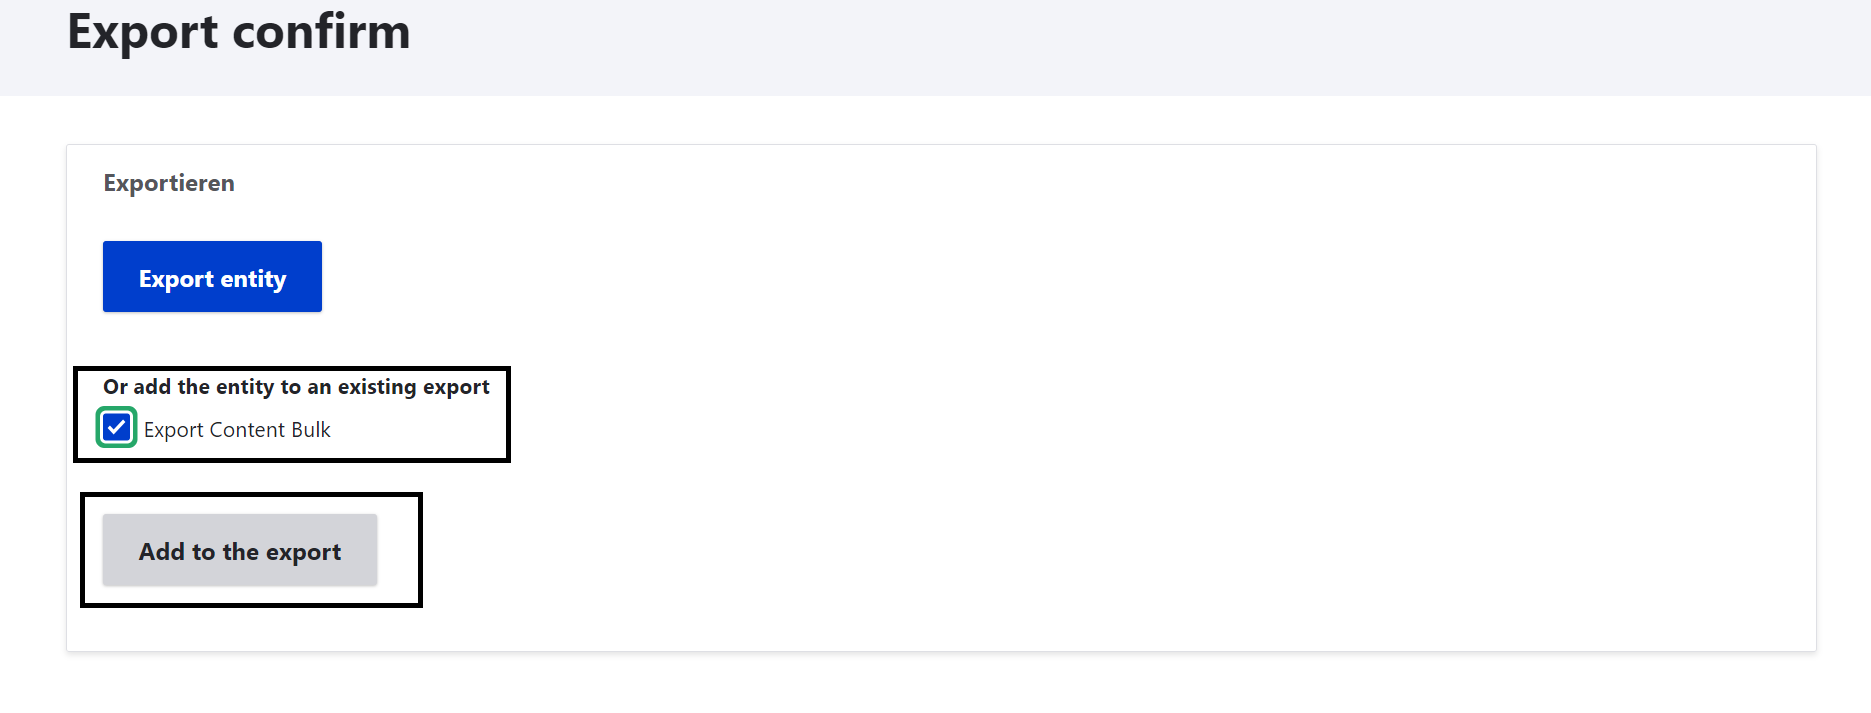
- At Export confirmation page select option to 'Add the Entity to an Existing Export' list it will add the selected content to a export list so we can modify review, delete content from list and export from there, It will save the exported content list, we can export same data anytime. Repeate the step 3 - 4 to add multiple content.
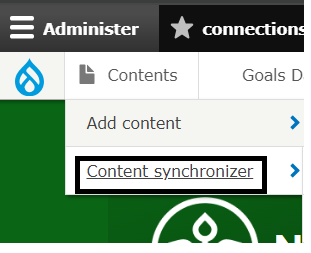
- To see the all added content entities to the export entity,hover on Inhalt(content) -> Content Synchronizer -> Exports. It will give the all the export entities created. Click on the export entity where the content added using steps 3 to 4. It will give all list of content entities added.
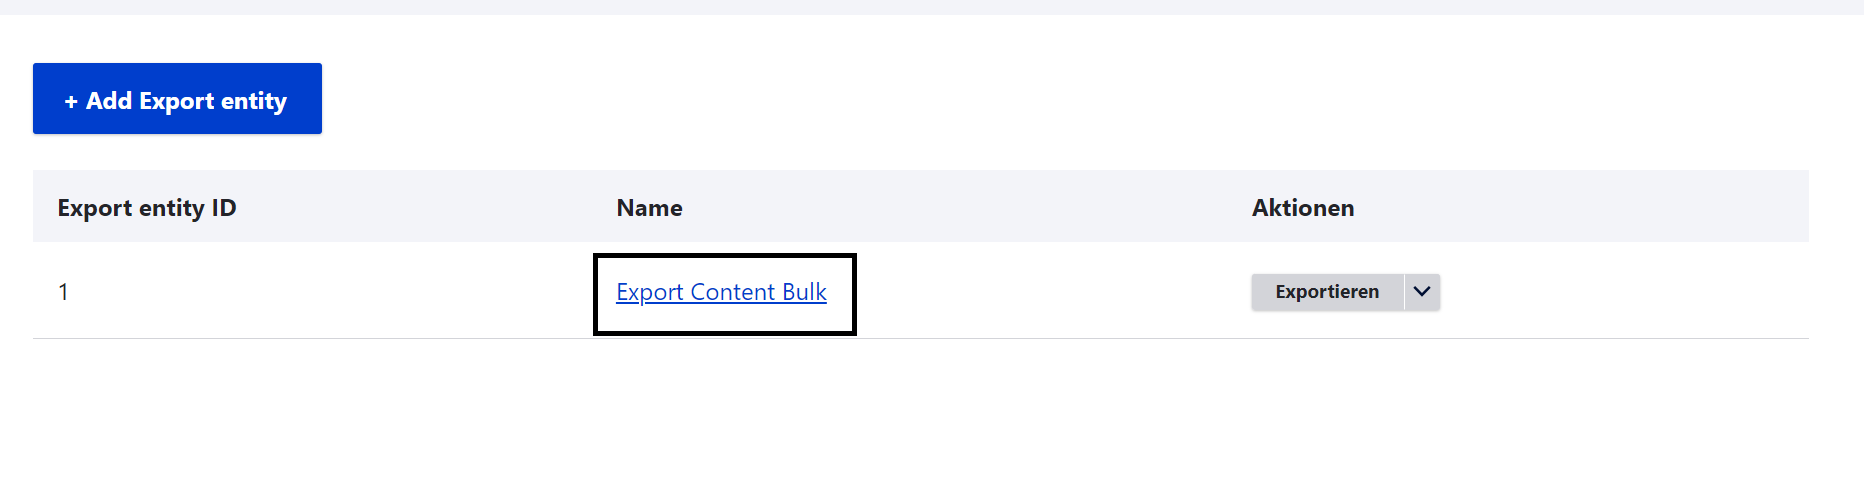
- Review all the content added, using 'Remove selected entities from the export list' button we can remove content added in the list. Once all content reviewed we can export the content, click on 'Launch Export' button at the bottom it will start the export.
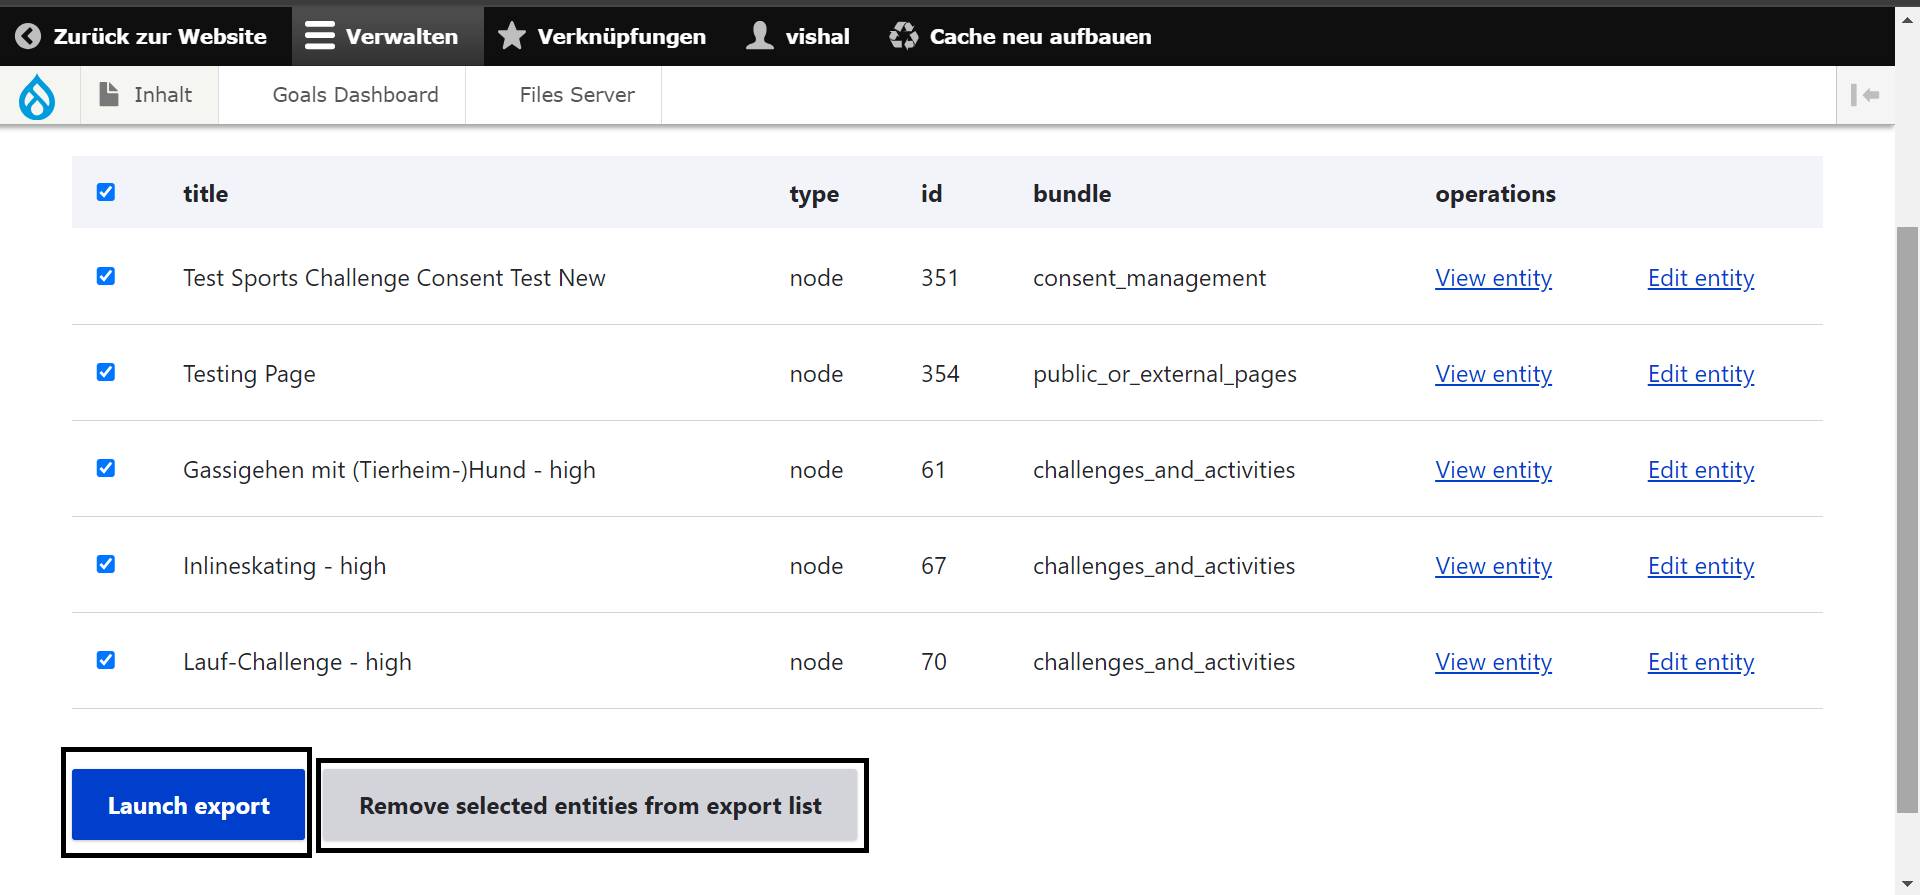 It will start the export process and once the export complete it will download the '.tar.gz' file contains the exported data.
Import Content
Steps to import content is as follows :
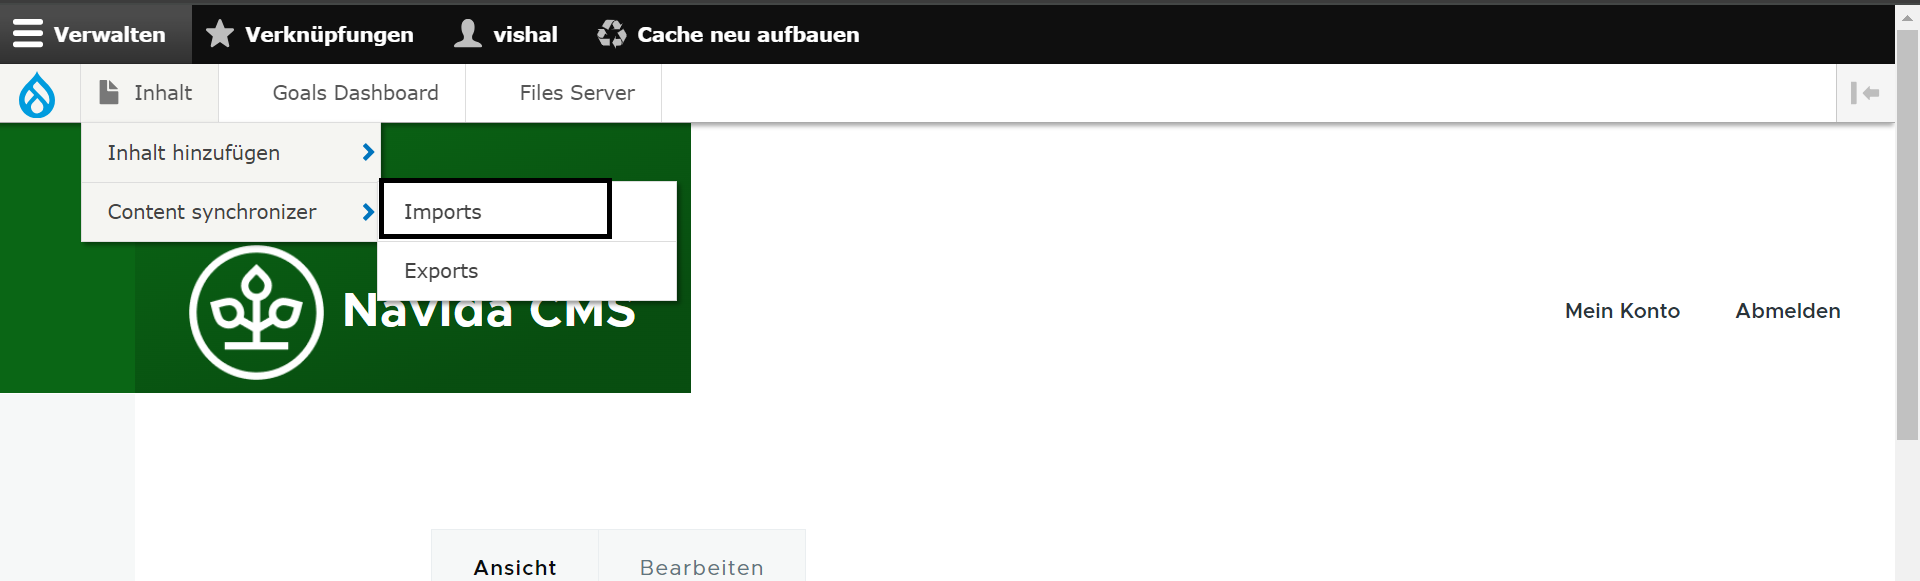
- To import content Hover on Inhalt(content) -> Content Synchronizer -> Import
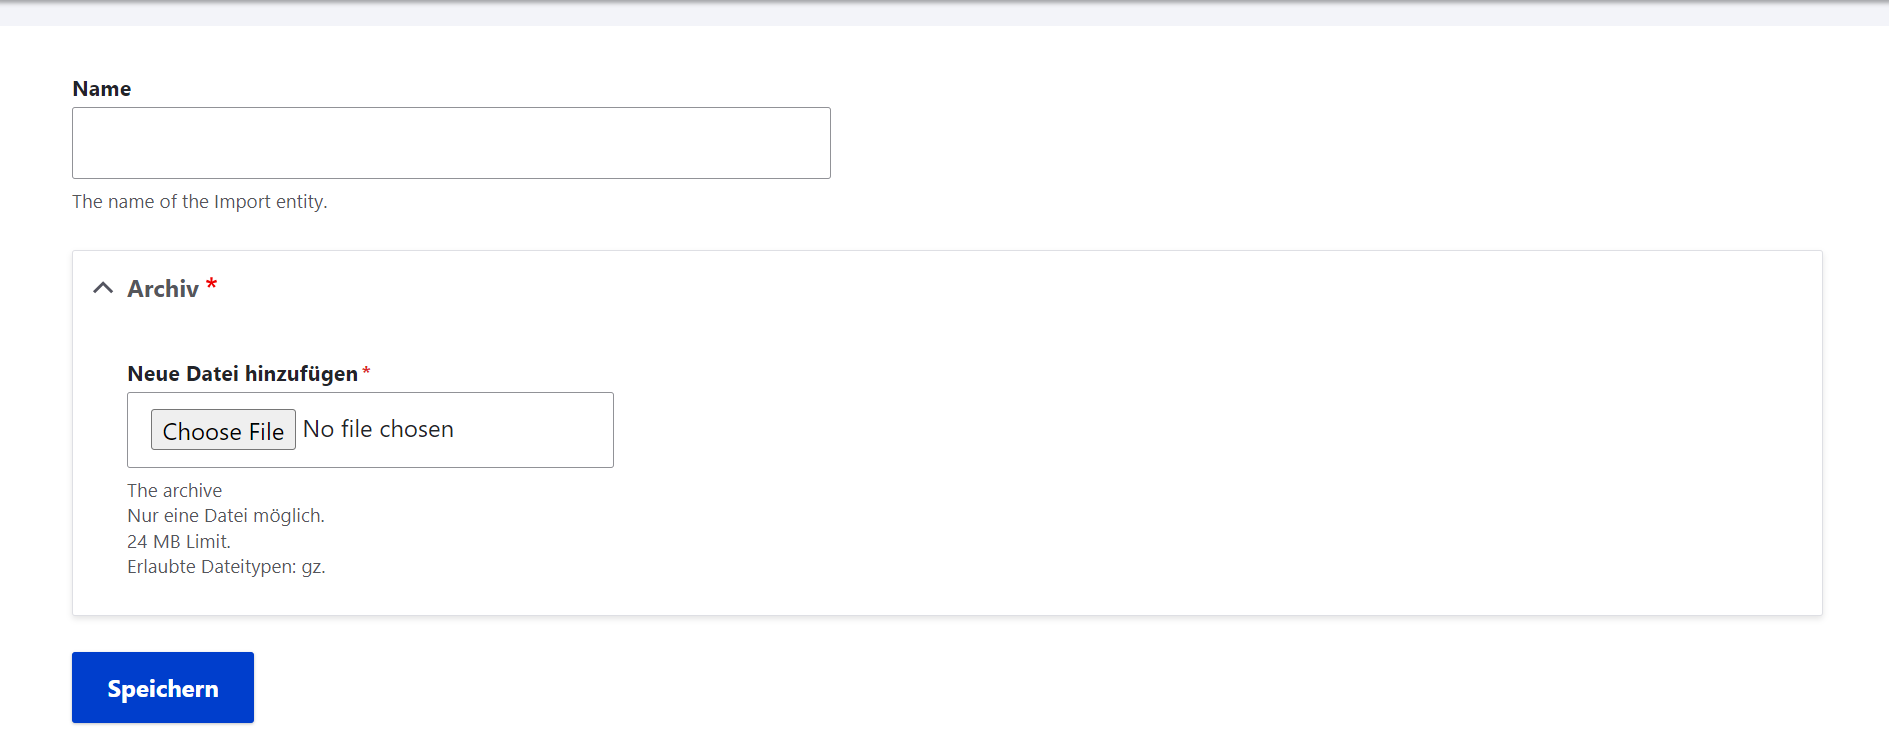
- It will give the list of all the imported entities. To add new import click on '+Add Import'

- It will open the form in the 'Name' field add the name for the import entity. at 'Archiv' field upload the '.tar.gz' file downloaded from the Content Export process.
- Click on 'Speichern' to start the import
- After successfull import it will give the content import list page with different options. At 'Einstellungen (Settings)' section Action on entity creation
- 'Publish created content' It will publish content while importing.
- 'Do not publish created content' it will not publish the content importing.
Action on entity creation
- 'Always update existing entity with importing content' - if this option is selected it will forcely update the content we are importing.
- 'Update existing entity only if the last change date of new content is more recent than the last change date of the corresponding existing entity' - It will compare the current content and the imported content if the imported content update date is more than the current content it will update the content this option is default selected.
- 'Do not update existing content' - If this option is selected, it will not update any content.
Entities to import This section contains the list of imported entities if we want to remove any content we can unselect the content from the list. Options in the tables are as follows,
- Checkbox - selecting this will select all the list (Default it is selected)
- 'title' - Content title
- 'Type' - Content Entity Type
- 'ID' - Content Id 'node-id'
- 'Status' - It will be 'Update' if content is getting updated & It will be 'create' if content is getting created.
- 'The operation' - It will give the link of the current entity getting updated we can view the content. It will be blank if the content is getting created.
- Last column will be 'Edit Entity' we can edit the current entity. In case of content is getting created this column will be blank and after importing it will show this option.
- After reviewing the all the content entities to be imported. Click on 'Import Selected entities' It will start import & once it is completed we can see the status from the list.
##Content Synchronizer.
Steps to Create Export Entity
- Hover on 'Inhalt (Contents)' -> Click on 'Content Synchronizer'.
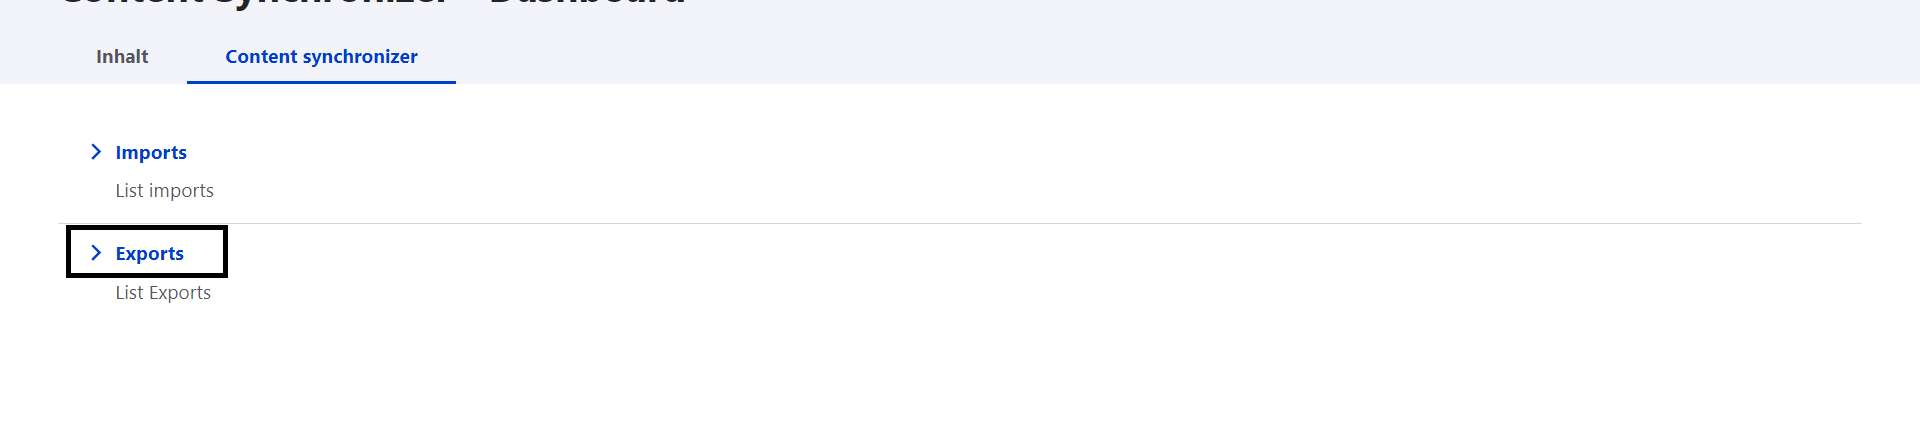
- It will give 2 options 'Imports' & 'Exports'. We can see all the imported entities list & we can import content. At Export we can create export entity & see all the past exported entities. Click on 'Exports'
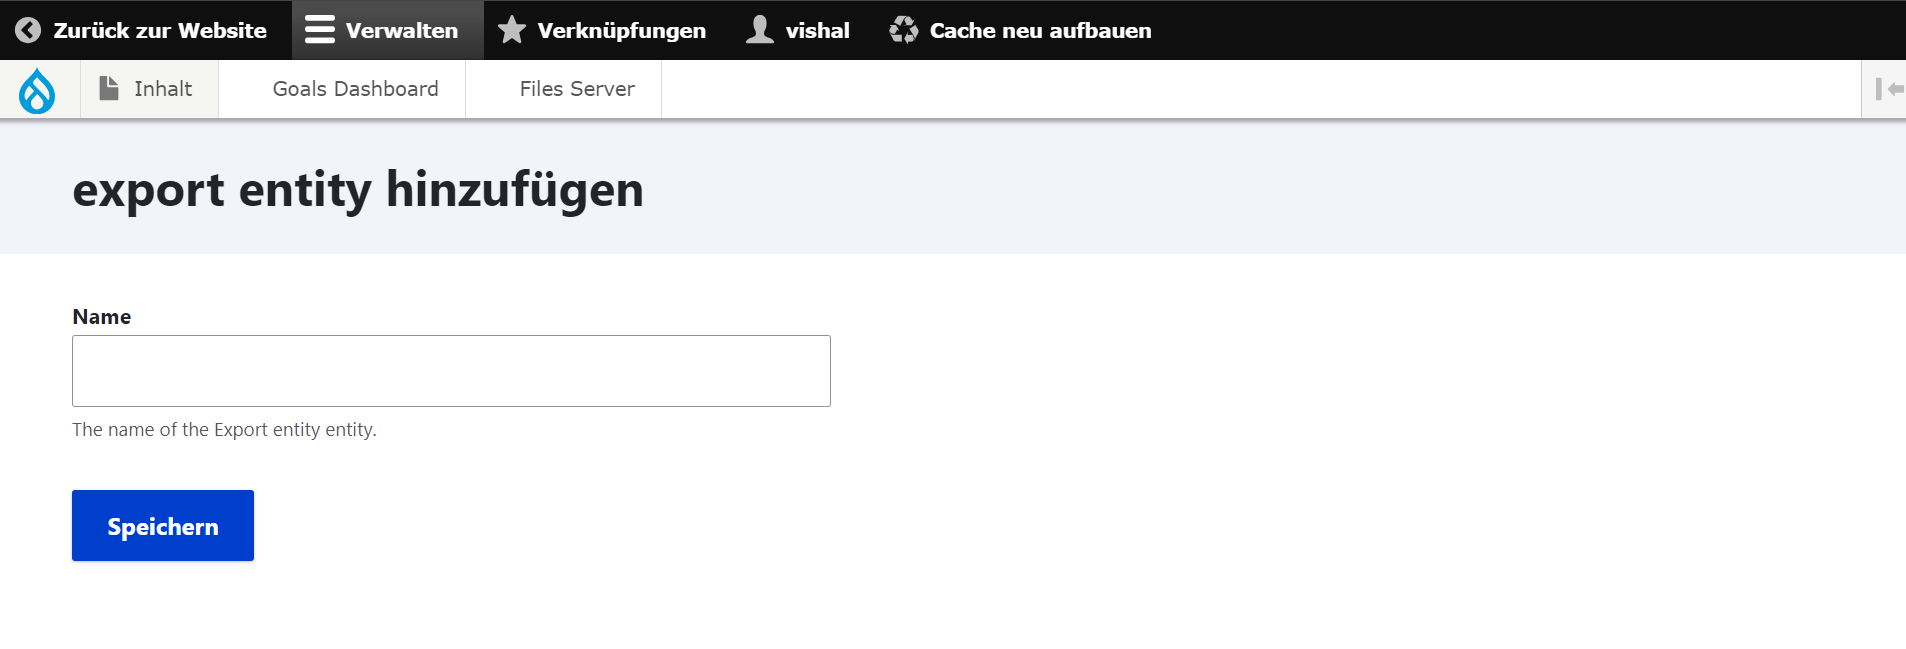
- Click on '+ Add Export entity'.

- At 'export entity hinzufügen' page, Enter 'name' (name of the export entity).
- Click on 'Speichern' it will create new export entity.
Important Notes
- We can export/import only 6 content entities for challenges & Activities content type.
- Please ensure/re-verify all the content selected for export & Import.
- Import & Export should be done using AOK User credentials.
- Once imported the content there is no rollback option so import the content carefully.
- If content is exported by aokplus user1 & content is going to be imported by aokplus user2 it will asign the auther as user2 for all the imported content or the current user who is importing the content.
- Grants will not be exported or imported after importing the content user needs to manually assign Grants so the imported content can be accessible to other similar roles users.